Fixed customer reviews logo

Logo integration
Some sellers prefer to integrate a fixed customer opinion logo rather than a widget in order to offer a less intrusive experience for the buyer. The goal is simple, to show that the shop collects customer reviews, while preserving the navigation experience. This allows for a better respect of your your e-commerce shop's graphic charter's integrity.
It is true that most e-sellers use the classic King-Avis widget, but following several requests from e-sellers, we decided to offer you the King-Avis badge that you can position at the location of your choice on your e-commerce shop.
Procedure?
To perform the integration, you just need to download the package of logos below which are available in different languages. Then you just have to host these logos on your hosting and display them while signaling the link on your notice page. You can find the link to your seller review page by going to "
My seller page" in your King-Avis back office.
Download logos
For clarity if you want to use simple logo integration, we recommend disabling the display of the classic King-Avis widget on all media, so that you do not have double display. You can disable the King-Avis widget from your back office under "
My Widget".
Example: Prestashop 1.7
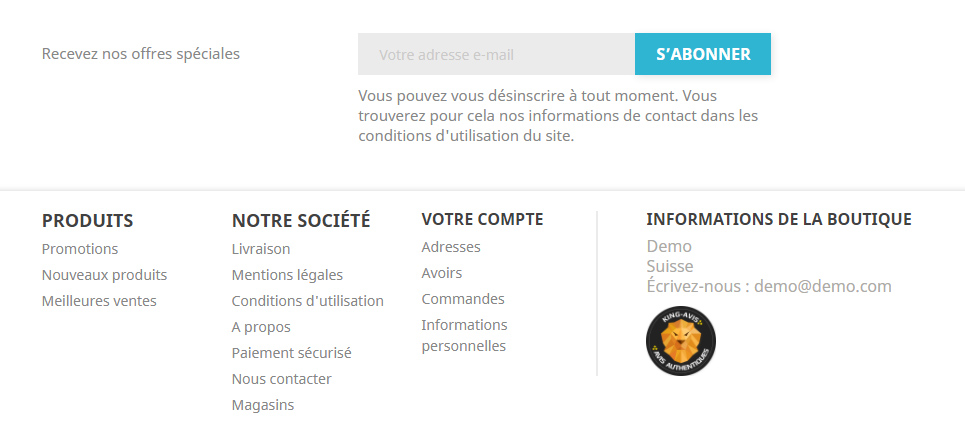
Here is an example of integration that could be envisaged, for example for Prestashop 1.7 (platform we usually work with). You can add the code below to your theme:
"/themes/classic/modules/ps_contactinfo/ps_contactinfo.tpl" and extract the logos in the file
"/img" located at the root of your shop.
Just before this line:
<div class="hidden-md-up">
You can add the following code:
	{* King-Avis *}

	<a href="https://king-avis.com/fr/merchant/profile/xxx/" target="_blank" style="margin-top:10px;display:inline-block;">

	     <img src="{$urls.base_url}img/badge-{$language.language_code}.png" style="width:70px;" title="King-Avis" alt="King-Avis">

	</a>

	{* -- *}
 Integrating the King-Avis customer logo into the footer is another simple and effective way to reassure your buyers. Creating this insertion in the footer will ensure permanent visibility of the badge.
Example: Prestashop 1.6
For versions similar to Prestashop 1.6, you can add the following code in your theme file:
"/themes/default-bootstrap/modules/blockcontactinfos/blockcontactinfos.tpl" and extract the logos from the
"/img" folder, located at the root of your shop.
Just after this line (approx. No. 49):
</ul>
You can add the following code:
	{* King-Avis *}

    <a  href="https://king-avis.com/fr/merchant/profile/xxx/" target="_blank" style="display:inline-block;">

		     <img src="{$base_dir_ssl}img/badge-{$lang_iso}.png" style="width:70px;" title="King-Avis" alt="King-Avis">

	</a>

	{* -- *}
 The rendering is similar to Prestashop Version 1.7: the badge is displayed below the company contact information. This location offers the advantage of being permanently visible on all your pages, including the mobile-optimized version.


 Integrating the King-Avis customer logo into the footer is another simple and effective way to reassure your buyers. Creating this insertion in the footer will ensure permanent visibility of the badge.
 The rendering is similar to Prestashop Version 1.7: the badge is displayed below the company contact information. This location offers the advantage of being permanently visible on all your pages, including the mobile-optimized version.